Customizing the Look of UINavigationBar and UINavigationController
 I’ve recently worked on a number of iOS projects that require a custom background for the UINavigationBar including the navigation bar used by the UINavigationController. Customizing the look of a UINavigationBar is actually pretty simple. You can set the tintColor property to the color of your choice. But sometimes you need to do more. For example, say you want to have a title in your navigation bar that uses a font not available on iPad and iPhone. For this you will need to use an image to customize the navigation bar.
Let’s take a look at the various ways to customize the navigation bar.
The UINavigationBar has a style property called barStyle. barStyle can be set to UIBarStyleDefault or UIBarStyleBlack. The default uses a blue gradient background. When using UIBarStyleBlack you can also set the translucent property to YES to give the navigation bar a partially opaque look. If you are using Interface Builder, then you will set the Style property in the Inspector window. Here you have the option to style the navigation bar as Default, Black Opaque, and Black Translucent.
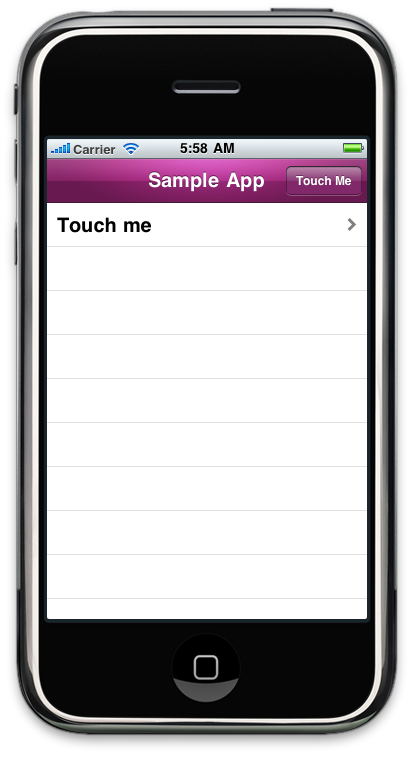
What if you want a color other than blue and black? You can set the tintColor property (aka Tint in IB) to any color you like. This changes the navigation bar’s color. Best of all, setting the tintColor will also change the background color used by the bar button items displayed within the navigation bar.
Sometimes, however, just changing the tint of the UINavigationBar isn’t enough. Sometimes you want to have a fancier background. Maybe the background you want has a different gradient style or lighting effect, or maybe you want a title displayed in the center of the navigation bar to use a font not available in iOS. How would you change the look of the navigation bar for these scenarios? Simple. You use an image that is drawn on the navigation bar.
There are two approaches you can use to draw an image on the navigation bar. You can create a new class that inherits from UINavigationBar and override the drawRect method. For example:
@interface KTNavigationBar : UINavigationBar {

}
@end

@implementation KTNavigationBar

- (void) drawRect:(CGRect)rect
{
    [super drawRect:rect];

    UIImage *image = [UIImage imageNamed: @"navbar.png"];
    [image drawInRect:CGRectMake(0, 0, self.frame.size.width, self.frame.size.height)];
}

@end
In this example, the image navbar.png is used to customize, or skin, the UINavigationBar. This is a nice, clean, object orientated way to customize the look of your navigation bar. The only thing you must remember to do is to use your custom UINavigationBar class within your application. This means changing the class type for those of us using IB.
Another trick you can use that doesn’t require changing the class type is to use a category. For example:
@interface UINavigationBar (KTCustomLook)

- (void) drawRect:(CGRect)rect;

@end

@implementation UINavigationBar (KTCustomLook)

- (void) drawRect:(CGRect)rect
{

    UIImage *image = [UIImage imageNamed: @"navbar.png"];
    [image drawInRect:CGRectMake(0, 0, self.frame.size.width, self.frame.size.height)];
}

@end
I admit I have used this approach in more than one project, but doesn’t feel right to me. It feels more like using voodoo or black magic then following good OO design. But this approach does work and it does save you time by eliminating the need to change the class type for each instance of UINavigationBar within your app. [Update: This approach doesn’t feel right because it overrides a method in a category. You should know this is a bad, bad thing, and I don’t encourage others to do it. That said, it does work.]
One thing to note when using an image to customize the UINavigationBar, you still want to set the tintColor for the navigation bar. As I mentioned, setting this property will also change the background color used by the bar button items. So you want to set the tintColor to the appropriate color making the button color fit in with the navigation bar color style.
For those of you who want to see these concepts in action, I posted a sample project, called CustomNavBar, on github. Enjoy.
Recent Posts
- 2015 Year In Review January 01, 2016
- Special Offer For Killink CSV Editor Customers November 20, 2015
- ANN: Killink's Retirement August 18, 2015
- ANN: Peak App Care August 13, 2015
- Quickly Post Photos To Facebook March 25, 2015